Lilly Ohno
Overview
Whether you’re acquiring new patients, communicating with doctors, or engaging patients with treatment care, email marketing and automation is an important tool for healthcare marketers. With Paubox Marketing, you can personalize and segment marketing emails while remaining HIPAA compliant.
Tip: 71% of consumers say a personalized experience would influence their decision to interact with emails.
The State of Personalization in Email
This comprehensive guide will take you through the steps to get your healthcare email marketing campaigns off the ground. In this guide, we’ll walk through how to use the main features of Paubox Marketing so you can get the most out of the platform.
Related: The definitive guide to HIPAA compliant email
Table of contents
- The possibilities of healthcare email marketing
- Set up your account
- Manage your contacts and lists
- Create your first email campaign
- Design an automated drip campaign
- Analyze results
- Start for free
The possibilities of healthcare email marketing
Create a stronger healthcare community with improved communication
Tailored messages that use ePHI are far more relevant to patients and customers, ensuring higher open rates and drive meaningful outcomes.
When marketing emails are targeted and personalized, it improves results and marketing return on investment. Research has shown that open rates are 14% higher, and click-through rates are more than 100% higher when using personalized messages versus generic marketing emails.
Ways to use personalized email marketing in healthcare
Here are examples of the types of personalized messages you can send with Paubox Marketing (while remaining HIPAA compliant!):
- Self-care or aftercare, such as advice on how to manage symptoms after treatment
- Preventative care, such as vaccine and screening reminders
- Welcome emails, such as new patient education and information requests
- Fundraising, such as donation campaigns to past patients
- Patient retention, such as updates on new services and information on events
Why Paubox Marketing?
Paubox Marketing is a ground-breaking product for healthcare. The solution allows you to segment and send secure emails with PHI to increase patient engagement and build your business while remaining HIPAA compliant.
Set up your account
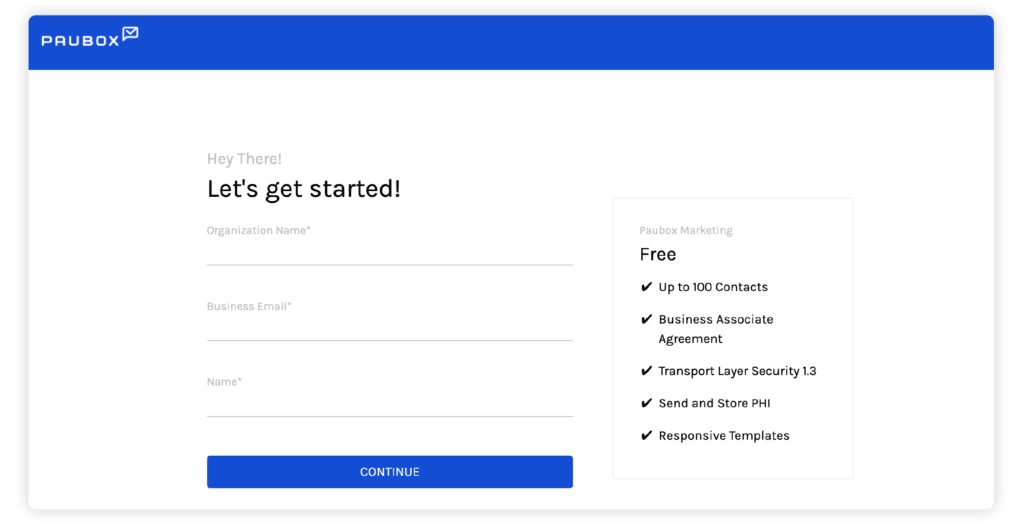
Sign up for free
To get started, sign up for a Paubox Marketing account. You can use Paubox Marketing for free (100 contact limit) to try out the platform without obligation.
Set up your account details
After you’ve signed up for Paubox Marketing, log into the Paubox dashboard and head to Settings under the Paubox Marketing section. On this page, you’ll set up your basic information:
- Physical address: Enter your organization’s physical address. This will be included in the footer of every marketing email sent out, as required by the CAN SPAM laws.
- From Name: The default display name that recipients will see on emails sent out. You can change this on individual emails.
- From Address: The default sender email address on emails you send out. You can also change this on individual emails.
Update your domain's SPF record
The last step in the setup process is to give Paubox Marketing permission to send marketing emails on your behalf. Follow these instructions to update your domain's SPF record using these instructions.
Additionally, enable DKIM, an optional authentication measure that improves the deliverability of your marketing emails and lessens the chance that they'll get marked as spam.
Manage your contacts and lists
Paubox Marketing’s contact management tool gives you the ability to securely store contact data (in a HIPAA compliant manner) and easily segment your contacts into audiences to send personalized marketing messages.
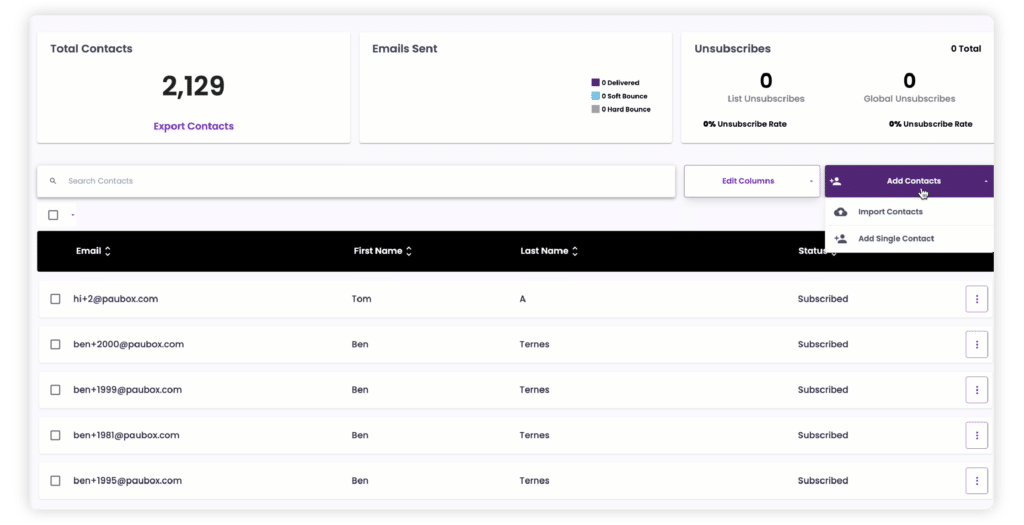
Import contact data
First, you’ll need to add your contacts to Paubox Marketing. You can do that in three ways (click the links for detailed instructions):
- Import contact data via a CSV file
- Add an individual contact manually by filling out a new contact form
- Set up a Marketing API to sync contact data from a 3rd party source (ex. your EHR system)
Smart Text data fields
In addition to importing basic contact data (email address, name, etc.) you can also import custom data fields. These fields, known as Smart Text, can be used to add dynamic information to your emails that is personalized to each individual. You can also use these data fields to quickly segment contacts into lists.
Here’s an example:
ABC Health Organization imports contact data that includes the column: Care Treatment. That column is populated with the specific care treatment for each patient. Now, ABC Health Organization can quickly segment everyone with a certain care treatment into a list. They can also create an email that references each recipient’s unique care treatment in the body of an email using dynamic Smart Text.
Build segmented lists
Segmented lists are important for sending targeted, relevant email marketing content to your recipients. Filter and sort your contacts based on data fields you’ve imported, then add them to a list.
Create your first email campaign
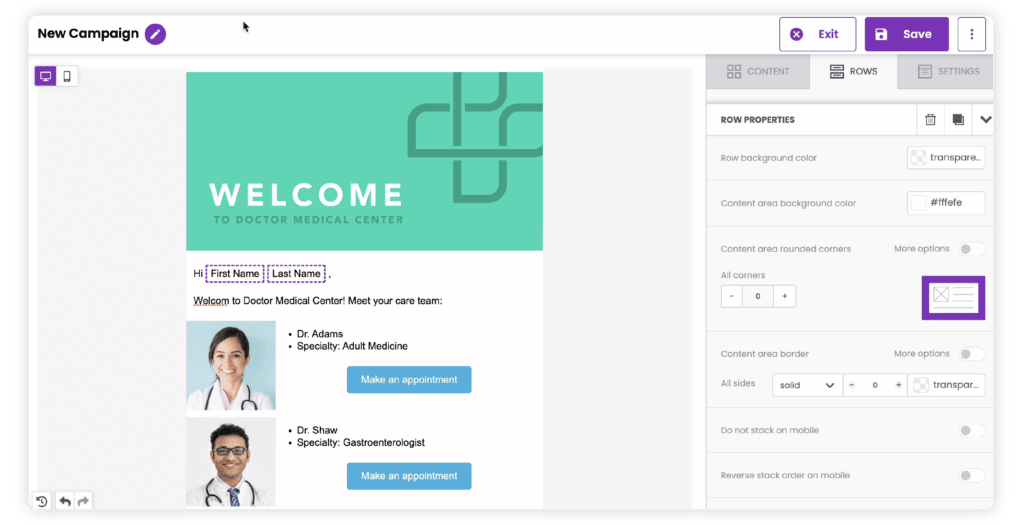
Paubox Marketing’s email builder gives you the tools to quickly design beautiful campaigns. Mix and match content blocks, and customize with your own images, text, and branding.
Using the Paubox Builder
Paubox Marketing’s email builder gives you the tools to quickly design beautiful campaigns. Mix and match content blocks, and customize with your own images, text, and branding.
Go to the Marketing Emails page and click on Paubox Builder to get started.
Content, Rows, and Settings
In the Content tab, you’ll find all the different types of content blocks available. Drag and drop a content type into the email editor.
Content types include:
- Title: Headlines and section titles
- Menu: Build a menu of links
- Paragraph: Longer paragraphs of body text
- Text: Body text block
- List: Bulleted and numbered lists
- Image: Upload and insert images
- Button: Add a call to action button
- Divider: Line divider for a visible separation between content blocks
- Spacer: Blank space that can be added between content blocks
- Social: Social buttons to promote your social channels
- HTML: Insert custom HTML code
- Video: Add links to video and automatically generate a preview image
- Icons: Use icon graphics to call attention to content
The Row tab allows you to choose different row options. Rows are collections of content blocks. You can use rows to group content blocks and apply similar settings to all content blocks within a row. You can choose to add a row with a single column or a row with multiple columns.
The Settings tab allows you to adjust the general settings of the email. Changes made on the Settings tab will applied to your entire email. On this tab you can:
- Change the pixel width of the email
- Set the content area alignment
- Adjust the email background and content background colors
- Set the default font type
- Set the default link color
Learn more about using the Paubox Builder
Importing and organizing images
After you’ve dropped an image content block into the editor, press Browse to access the image file manager.
In the file manager, you can:
- Add and manage folders
- Upload images
- Delete images
- Choose images to insert into your email
Most of the common image file types can be uploaded to the file manager, including jpeg, png, and gif formats. Note, there is no maximum file size for the images you upload, but it’s best to stay under 1MB for optimal viewing. Additionally, images should be no wider than 1920px in order to maintain the integrity of the image.
Preview an email
Before you send your email, check that it will look correct to your recipients. In the email editor, you have the option of viewing your email in a desktop or mobile view. To switch between the two, click on either the desktop or mobile icon on the top left corner of the email editor.
You can also email yourself a preview by clicking on the top right menu options next to the Save button. Click on Send Preview to send a test email.
Sending an email campaign
Once you’re ready to send an email, choose Continue in the builder to move forward with sending the email. On the Send page, you’ll have options to:
- Change the default sender name and email address
- Select the list to send the email
- Add any additional recipients (this is where you’d include any internal recipients who need to receive a copy of the email)
- Choose to send immediately or schedule the email to send at a later date and time
Using the HTML builder
With Paubox Marketing, you can also create emails using the custom HTML builder for even more flexibility to design emails. With this builder, you can design your email in an external editor (examples include: beefree.io, Adobe Dreamweaver) and import the HTML code. Within the HTML builder, you can revise code, add in smart text and preview your final email.
Learn more about using the HTML builder
Design an automated drip campaign
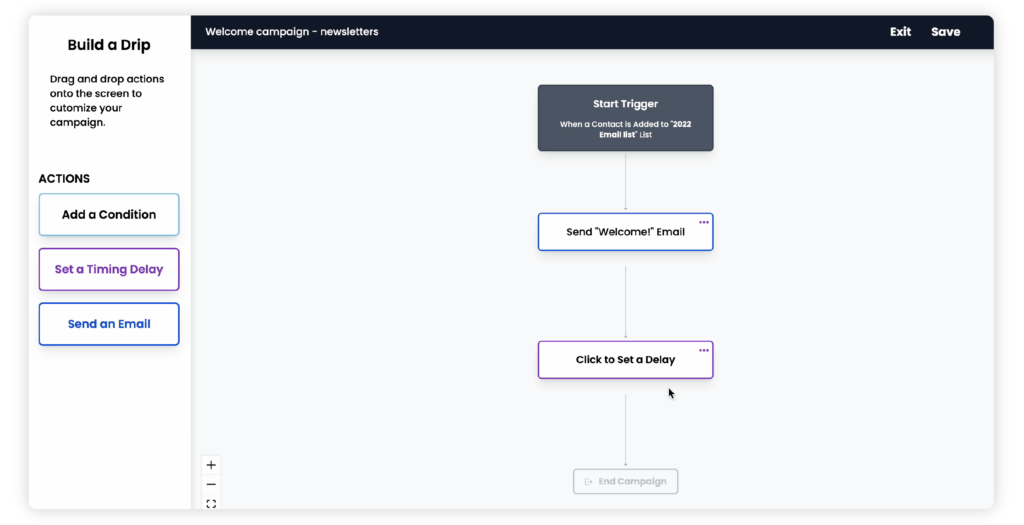
Build sophisticated, automated nurture campaigns to segmented lists with the drag-and-drop drip campaign function in Paubox Marketing.
Create a drip campaign
Go to Drip Campaigns on the left-hand navigation and click on Create New Drip Campaign to start building your campaign.
To get started:
- First, give your campaign a unique Drip Campaign ID (aka name)
- Select the type of trigger for the campaign
- Select the list that the drip campaign will send to or create a new list for the campaign
Choosing a trigger
Your starting point or trigger will be the event or activity that starts a contact on your drip campaign. You can choose to send a drip campaign to all contacts on a list or start a drip campaign for any new contacts that are added to a list.
Building your drip campaign
Drag-and-drop actions to your drip journey, including:
- Timing delays
- Emails
- Condition branches
Add a timing delay
A timing delay allows you to set a delay before the next action begins. You can choose to set the delay for a certain number of hours or days.
Add an email
When choosing an email, you’ll need to add the subject, from address, and from name. Choose an existing email campaign to send from the drop-down list.
Add a condition branch
Condition branches can be used to send contacts down a different journey of the drip campaign, depending on the conditions that you set. You’ll be able to choose between the following conditions:
- If the previous email is opened
- If a link in the previous email is clicked
Note, for the link clicked condition, this means that any link within the email sent was clicked.
Continue to add actions to your drip campaign to build the contact journey. You may also delete an action in your drip by clicking on the menu button on the action within the builder.
Activating the drip campaign
After building your drip campaign, you can choose to:
- Edit your campaign
- Start your campaign
Once your campaign has started, you have the option to Pause and Resume your campaign.
Learn more about building a drip campaign
Analyze results
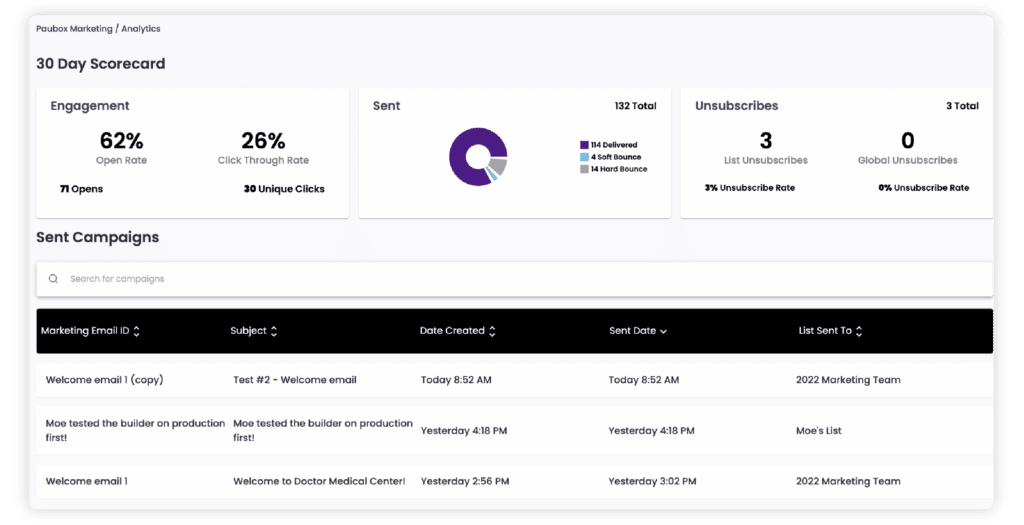
Analyze campaign results with rich analytics and data visualizations with Paubox Marketing analytics dashboard.
30-day scorecard
On the Analytics page, you’ll see a 30-day scorecard that shows you a snapshot view of how all your emails have performed, as an aggregate, over the past 30 days.
Email analytics
To see how an individual email campaign performed, find the email under the Analytics tab. Clicking on the email will show you a snapshot view of the email performance. Click on Show more analytics to see the in-depth performance.
The analytics page for each email shows:
- Image preview of the email sent
- Open rates
- Click through rates
- Delivery rates (delivered and bounced)
- Unsubscribe rates
- Tracking link performance (view which recipients clicked each link)
You can also export a CSV of the campaign analytics to see even more data.
Start for free
Ready to get started? Set up an account for free (with up to 100 contacts) to try out the platform.